Friday, January 14, 2011

Evening Filler

Well Just to give you a little back brief, we don't have cable (let alone a pair  of rabbit ears) to watch television in our household, because well frankly we never watched it to begin with so why start now. So while waiting for my children to fall asleep so I can watch a non-disneyish child geared film I did this...for two hours 'cause that's how long it took them to go to sleep. Make note that I was originally putting away my paints because I am taking a drawing class this semester.


So if you ever think to yourself and say "What can I do to kill some time?" make yourself popcorn, grab paints, some brushes, and paper (I just happen to have a cheap 2 pack of 11"x14" canvases) and paint your pooch (or kitty*I don't discriminate) while they beg for the popcorn your munching on!

Friday, January 7, 2011

Diaper Cakes

So often enough I have had to make diaper cakes for my pregnant friends, coworkers, my husband's friends and co-workers, and I just wanted to share the love that you to can make this great gift


Gather your supplies:
CAKE
Size NB or 1-2 disposable baby diapers
Receiving Blankets/Hooded Towels (outside 
Ribbon or Diaper Pins

DECORATIONS (*try to have a theme/color)
Stuffed Animals
Small baby rattles/teethers/pacifiers
Baby supplies *travel fit best
Baby Spoon/bottles
Baby Hat/Bib/Socks

Cellophane wrapping and bow *optional


Start by folding the blankets/towels so they slightly taller then the diaper


Layer your folded blanket/towels in tier order 


Fold ends overlaplaping and secure with ribbon or diaper pins


Set largest tier upright and open making a circle and add diapers in a rotating overlaping manner


Continue this with all tiers


Stack tiers accordingly....onto the fun part


Secure baby items with ribbon


Finish by curling ribbon or bows (clip out initial tier building ribbon if used)


Wrap with cellophane and bows

Here are other pictures of baby diaper cakes I have done in the past


Monday, October 4, 2010

MIA....but I have an alibi

In my defense I am a full time student amongst the other things that make me, well ME! So to show you I haven't been a complete loser I'll let you in on my project that has been keeping me away....photography class. So enjoy!


Monday, September 6, 2010

Peanut Butter-Chocolate Chunk Cookies

I was craving Reese's peanut butter cups yesterday, but it was almost midnight, and I was not going out. So next thought, chocolate chips and peanutbutter....I know I am bad....so while chocolate was in hand and reaching for the peanut butter I can accross this recipe on the back of the chocolate bag! SCORE!

Peanut Butter-Chocolate Chunk Cookies

1-3/4 cups flour
3/4 tsp. baking soda
1/4 tsp. salt
3/4 cup (1-1/2 sticks) butter or margarine, softened
1 cup peanut butter
1/2 cup granulated sugar
1/2 cup firmly packed brown sugar
1 egg
1 tsp. vanilla
1 pkg. (8 squares) BAKER'S Semi-Sweet Chocolate, chopped
1 cup chopped PLANTERS Salted Peanuts

PREHEAT oven to 375°F. Mix flour, baking soda and salt in medium bowl; set aside.
BEAT butter, peanut butter and sugars in large bowl with electric mixer on medium speed until light and fluffy. Add egg and vanilla; mix well. Gradually add flour mixture, mixing well after each addition. Stir in chocolate and peanuts. Drop heaping tablespoonfuls of dough, 2 inches apart, onto ungreased baking sheets.
BAKE 9 to 11 minutes or until lightly browned. Cool on baking sheets 1 minute. Remove to wire racks to cool completely.

I do have to say that I omitted the peanuts (didn't have any on had, again it was almost midnight) and used Baker's semi-sweet chocolate chunks instead of the bar style (so much easier), oh and it only made two dozen cookies...then again I like BIG cookies! Oh SOOO GOOD!

P.S.
Kids raided them this morning....good thing today was a holiday!

My First Blog Award!!!


I can't believe it....I've only made two post and I received my first blog award from Mandy of Mandy's Creative Corner. Check her out...she's got some really great recipes and inspires the crafter in me! Thank you so much Mandy for believing in me!

MCC


The Rules for “A Blog With Substance” Award:
  • Thank the blogger who awarded it to you.
  • Sum up your blogging philosophy, motivation, and experience using 5 words.
  • Pass it on to 10 other people you feel have blogs with real substance.
My 5 words:

*yummy


*pretty
*easy
*crafty
*love

Tuesday, August 24, 2010

French Memo Board Tutorial


It has come to my attention since school is back in session that picture day is soon to follow. So I am one step ahead of my daughter's soon to be large collection of pictures of friends and (hopefully) family.

Supplies:
Cork Board- 17"x 23"     *found mine at a garage sale for a quarter
Craft Batting- 19"x 25"
Fabric- 22"x 27" (3/4 yrd when store cut/ then cut in half at home)
Ribbon- 18ft spool (6 yrd.)
Buttons- Flat Backed     *mine had tails so I used wire cutters to make flat
Acrylic Paint (optional if you have border trim)
Clear Acrylic Spray Sealer (optional if you have border trim)

Tools:
Low Temperature Glue Gun **(high temperature glue gun can burn through batting and fabric)
Spray Adhesive
Paper Bags (for work area when working with spray adhesive)
Staple Gun with 5/16" staples


1. If cork board has no frame then skip to step #2. If cork board has a frame take apart from board...choose now if you want to put back on frame, if yes paint them and spray with clear acrylic sealer and let dry or keep them as they are, if not throw them away.


2. Using the spray adhesive on front side of your cork board and gently attach two layers of craft batting making sure an even overlap around board. Spray front side of batting with spray adhesive and gently attach keeping a overlap around batting
*Please note here that my fabric is a double sided print and that if you have single sided print to make sure the finished side is outward facing when attaching)


3. Using your glue gun, carefully glue your fabric/batting to back side of the board. Remember when gluing opposite side to pull tautly, no one wants wrinkles in there finished work.
Non-Framing option: notch only batting for less bulk when folding corners, but fully covering sides
Framed option: notch both fabric and batting for less bulk when reassembling outer frame.


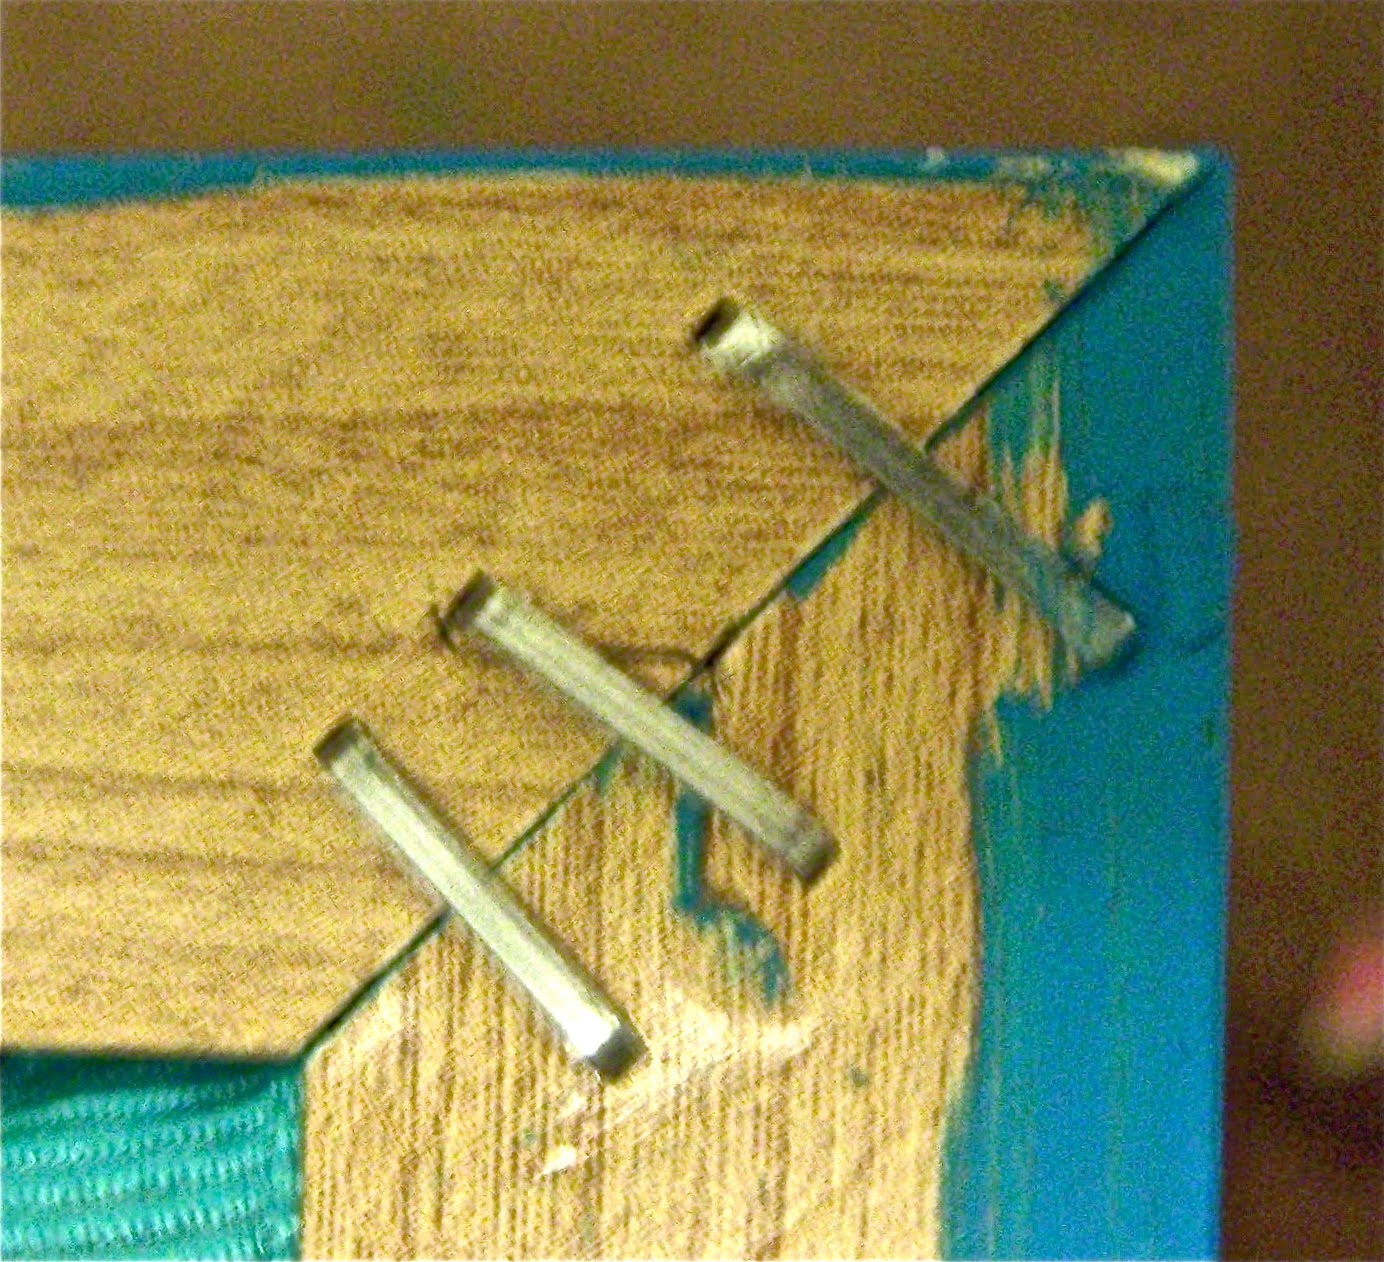
4. Lay out your ribbon in an diamond shape pattern until you are happy with your pattern. Using the staple gun staple the centers where each ribbon cross. This will give it the plush look.
*I like using a basket weave technic to prevent slipping of ribbon when stapling and alternating direction of staple with the top ribbon, look at detailed picture)


5. Wrap outer edges of ribbon around your wrapped fabric board tautly and secure to the back with the glue gun. Attach buttons to the centers of each stapled ribbon cross with glue gun.
Non-Framing option: Go to #6.
Framed option: Skip to step #7.


6. Attach wall mounting hangers to the back top corners. You are finished!

7. Reassemble frame around fabric board. Using staple gun, staple frame corners together from back side, and also the center back of each frame side to board. Attach wall mounting hangers to the back top corners. You are finished!


Saturday, August 21, 2010

Wire Pictorial Family Tree

I wanted something simple to display family photos instead of just keeping them inside a scrapbook (don't get the wrong idea of me and scrapbooks, but I don't have enough people to come over wanting to browse through my family photos). So when I found this at mormonchic it was a must.
This is my finished "tree", but I have not put pictures on this since I am still deciding on which pictures to add to it, but go to link above to see idea.
When I went to my local arts and craft suppliers, I found wire and craft foil in an array of colors, so don't feel the need to follow color scheme exactly. Also when enlarging to 150, I found that mine fits beautifully inside a 12"x12" shadow box.